 100% Falloff. 100% 衰退
 0% Falloff.
 Light
Object 轻物体Basic 基础Coord.General 常规Details 详情Visibility 能见度Shadow 阴影Photometric 光度计的Caustics 焦散Noise 噪音Lens 镜头Project 工程项目
Light
Object 轻物体Basic 基础Coord.General 常规Details 详情Visibility 能见度Shadow 阴影Photometric 光度计的Caustics 焦散Noise 噪音Lens 镜头Project 工程项目
Visibility
能见度

使用 falloffalloff [0. . 100% ]
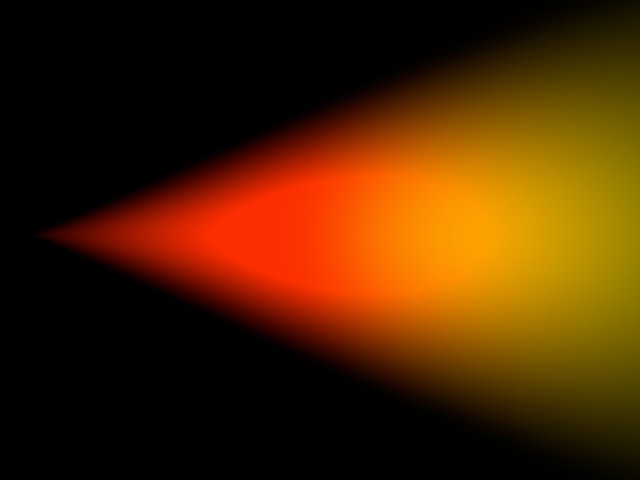
Falloff is the percentage reduction in the light’s density. The axial falloff of the visible light is set to a standard 100%. This means that from the origin of the light to its outer distance, the density of the visible light falls from 100% to 0%. So, if a value of 10% is entered into the Falloff box, the outside edge will be at 90% visibility. Enable or disable Use Falloff to switch falloff on or off.
衰减是光密度减少的百分比。可见光的轴向衰减被设置为100% 的标准。这意味着从光源到它的外部距离,可见光的密度从100% 下降到0% 。因此,如果一个10% 的值被输入到 Falloff 框中,外部边缘将是90% 的可见度。启用或禁用 Use Falloff 来开关 Falloff 或 off。
|
100% Falloff. 100% 衰退
|
0% Falloff.
|
Use Edge Falloff
Edge Falloff[0..100%]
使用 Edge FalloffEdge Falloff [0. . 100% ]
Edge Falloff is relevant only with Spotlight sources. The Edge Falloff determines how quickly the light’s density decreases towards the edge of the light cone. If you enter a value of 0% (or disable Use Edge Falloff), you will produce a very hard visible light. A value of 100% gives a more gradual falloff from the inside of the light cone to its outer edge, until it reaches 0%.
Edge Falloff 仅与 Spotlight 源相关。边缘衰减决定了光线密度向光锥边缘衰减的速度。如果你输入一个0% 的值(或禁用使用边缘衰减) ,你将产生一个非常困难的可见光。值为100% 时,光锥从内部向外缘逐渐下降,直到达到0% 。
 0 % Edge Falloff. 0% Edge Falloff 0 % Edge Falloff. 0% Edge Falloff
|
 100 % Edge Falloff. 100% Edge Falloff 100 % Edge Falloff. 100% Edge Falloff
|
彩色边缘脱落
This option is only available with Spotlight sources, and in addition, Use Edge Falloff must be enabled. Normally, the Inner Color behaves in such a way that it travels along the Z axis of the Spotlight source linearly to the Outer Color. However, enabling Colored Edge Falloff will cause the Inner Color to also spread outwards radially from the Inner Angle to meet the Outer Color.
此选项仅在 Spotlight 源中可用,此外,必须启用 Use Edge Falloff。通常,“内部颜色”的行为方式是沿着“聚光灯”源的“ z”轴线性地传播到“外部颜色”。然而,启用彩色边缘衰减将导致内部颜色也从内部角度径向向外扩散,以满足外部颜色。
 Colored Edge Falloff
disabled. 颜色边缘退出禁用 Colored Edge Falloff
disabled. 颜色边缘退出禁用
|
 Colored Edge Falloff enabled. 启用彩色边缘衰减 Colored Edge Falloff enabled. 启用彩色边缘衰减
|
内部距离[0. . + ∞ m ]
Beneath this value the density of the visible light is always a constant 100%. The falloff begins only outside this distance.
在这个值之下,可见光的密度总是100% 不变。只有在这个距离之外才会开始下降。
外部距离[0. . + ∞ m ]
Between the Inner Distance and the Outer Distance the density of the visible light changes from 100% to 0%.
在内部距离和外部距离之间,可见光的密度从100% 变化到0% 。
相对比例[% ]
When using omni lights, modify the scale of the Outer Distance value along each axis using the three Relative Scale text boxes.
当使用泛光灯时,可以使用三个相对缩放文本框来修改外部距离的缩放值。
样本距离[0. . + ∞ m ]
The Sample Distance is relevant for visible volumetric lights.
样本距离是相关的可见体积灯。
Adjusting this value defines how finely the visible light’s volumetric shadow will be computed. Larger values lead to a somewhat rough (but swift) calculation, while smaller values lead to a much finer, but more time-consuming, result.
调整这个值定义了可见光的体积阴影的计算精度。较大的值会导致有点粗略(但是很快)的计算,而较小的值会导致更精细但是更耗时的结果。
Take care with the Sample Distance values. Finding a happy medium (small for fine detail, but as large as possible for reducing render time) is the key here. 注意样本距离值。找到一个快乐的中等(小的细节,但为减少渲染时间尽可能大)是这里的关键The value of this Sample Distance is measured in world units. This value thus determines how finely the shadows within a visible light will be sampled. Values will usually be from 1/10th to 1/1000th of the light source radius. By increasing the value your scene will render noticeably faster but certain parts of your scene will be sampled very roughly, resulting in sampling artifacts.
这个样本距离的值是以世界单位来度量的。因此,这个值决定了可见光中阴影的采样精度。数值通常在光源半径的1/10到1/1000之间。通过增加值,你的场景渲染速度会明显加快,但是你的场景的某些部分会被粗略地采样,从而产生采样效果。
To reduce these sampling artifacts requires a reduction in your sampling value too. The smaller the value, however, the higher the cost in rendering time.
为了减少这些抽样工件,还需要减少抽样值。然而,值越小,渲染时间的成本就越高。
距离提示示例
To produce fine shafts of light, such as those produced when light beams radiate through cracks or from behind stone columns, set the Sample Distance to a relatively low value. On the other hand, a light that is completely covered and allows no beams of light to break through may be sampled at a much higher value.
为了产生精细的光束,例如当光束通过裂缝或从石柱后面射出时产生的光束,将取样距离设置为相对较低的值。另一方面,完全覆盖并且不允许光束穿透的灯可以采样到更高的值。
To clarify this, here’s a small example; the pumpkin in the pictures below has a radius of 150 units, the visible volumetric light a radius (Outer Distance) of 700 units.
为了澄清这一点,这里有一个小例子: 下面图片中的南瓜半径为150个单位,可见体积光的半径(外部距离)为700个单位。
 From left to right: Sample Distance: 10.
Render time: 105 s. The volumetric light looks perfect. / Sample Distance: 20. Render time: 60 s.
Here the rays emitting from the mouth and the right eye are showing the first signs of artifacts. / Sample
Distance: 40. Render time: 35 s. You can clearly see now how the rays in the visible light are losing their
fine edges. / Sample Distance: 80. Render time: 23 s. The picture has, quite literally, been rendered
useless. 从左到右: 样本距离: 10。渲染时间: 105秒。体积光看起来很完美。/样本距离: 20。渲染时间: 60秒。从嘴和右眼发出的射线显示出人工制品的最初迹象。/样本距离: 40。渲染时间: 35秒。你现在可以清楚地看到可见光中的光线是如何失去它们的精细边缘的。/样本距离: 80。渲染时间: 23秒。毫不夸张地说,这张照片已经变得毫无用处了
From left to right: Sample Distance: 10.
Render time: 105 s. The volumetric light looks perfect. / Sample Distance: 20. Render time: 60 s.
Here the rays emitting from the mouth and the right eye are showing the first signs of artifacts. / Sample
Distance: 40. Render time: 35 s. You can clearly see now how the rays in the visible light are losing their
fine edges. / Sample Distance: 80. Render time: 23 s. The picture has, quite literally, been rendered
useless. 从左到右: 样本距离: 10。渲染时间: 105秒。体积光看起来很完美。/样本距离: 20。渲染时间: 60秒。从嘴和右眼发出的射线显示出人工制品的最初迹象。/样本距离: 40。渲染时间: 35秒。你现在可以清楚地看到可见光中的光线是如何失去它们的精细边缘的。/样本距离: 80。渲染时间: 23秒。毫不夸张地说,这张照片已经变得毫无用处了
So why is volumetric lighting so time-consuming for the renderer?
那么为什么体积照明对渲染器来说如此耗时呢?
When a beam hits a light cone, it is not only the intensity of the light that needs to be computed. Additionally, for each part of the beam, Cinema 4D needs to look for other objects within the light cone that might be casting shadows. So for every part of the beam of light, an extra raytracer ray needs to be initiated and emitted.
当光束碰到光锥时,需要计算的不仅仅是光的强度。此外,对于光束的每一部分,Cinema 4D 需要在光锥内寻找可能投射阴影的其他物体。因此,对于光束的每一部分,都需要启动并发射一个额外的光线追踪器光线。
Because it is not possible to shrink segments in the fog below a certain length, an approximation must be used; the length of the light cone is subdivided into equal parts.
因为在雾中不可能将雾段缩小到一定长度以下,所以必须使用近似值; 光锥的长度被细分为相等的部分。
Suppose the raytracer ray hits the light cone and the distance between the entry and the exit points of the light cone is 1,000 units. A sample distance of 50 units will mean that an intensity value and a shadow beam will have to be calculated 20 times (1,000/50). The shorter the sample distance, the longer the calculation will take.
假设光线射到光锥上,光锥的进出点之间的距离为1,000个单位。50个单位的采样距离意味着一个强度值和一个阴影光束必须计算20倍(1,000/50)。取样距离越短,计算所需的时间就越长。
Even with just five subdivisions (so a sample distance of 200 in the above example), this will require a five-fold increase per raytracer ray and per contact with the light cone than without volumetric lighting. Using progressively finer subdivisions, the processing time involved very quickly becomes astronomical.
即使只有5个细分(在上面的例子中,样本距离为200) ,每个光线跟踪射线和每个接触光锥比没有体积照明需要增加5倍。使用越来越精细的细分,所涉及的处理时间很快就会变成天文数字。
This is an inherent problem with computer graphics that cannot be resolved or accelerated other than by throwing processor power at it.
这是一个与生俱来的问题,除了使用强大的处理器之外,无法解决或加速计算机图形学。
So why can’t you input a fixed value for the number of samples?
那么,为什么不能为样本数量输入一个固定值呢?
Well, if the raytracer beam hits the light cone at its beginning, the distance between the entry and exit points might be, for example, 100 units. But if the beam hits the cone further from the light source, this distance might grow to 5,000 units or more.
好吧,如果射线追踪光束在它的开始点击光锥,进入点和出口点之间的距离可能是,例如,100个单位。但是如果光束到达距离光源更远的圆锥体,这个距离可能会增加到5000个单位或更多。
So if you used a fixed number of samples, at the narrow end of the cone a lot of unnecessary calculations would be made and later too few (which would result in artifacts).
因此,如果你使用固定数量的样本,在锥体的狭窄一端会产生大量不必要的计算,以后会产生过少的样本(这将导致人工制品)。
Volumetric lighting needs a lot of calculation time, therefore render such light sources only when it is absolutely necessary. 体积照明需要大量的计算时间,因此只有在绝对必要的情况下才能渲染出这样的光源 .亮度[0. . 1万% ]
This value is the brightness of the visible light source.
这个值是可见光源的亮度。
灰尘[0. . 100% ]
Determines the darkness of the light cone. With a Dust value of more than 0%, Brightness is subtracted instead of added.
确定光锥的暗度。灰尘值大于0% 时,亮度将减去而不是增加。
To ensure you see the full effect of this, lower the light’s brightness accordingly.
为了确保你能看到全部的效果,相应地降低光的亮度。
The difference between a normal bright light and a dust-assigned light can be seen clearly in the following illustration. To the left is a bright, visible light. To the right a dark, dusty, somewhat sooty light.
正常亮光和灰尘指定光之间的区别可以在下图中清楚地看到。左边是明亮的可见光。右边是一片黑暗、灰蒙蒙、有点乌黑的亮光。
 To create a dark, dusty light, on the 为了创造一个黑暗,灰尘的光,在Visibility 能见度 tab, set 标签,准备Brightness 亮度 to a low
value. 到一个很低的值
To create a dark, dusty light, on the 为了创造一个黑暗,灰尘的光,在Visibility 能见度 tab, set 标签,准备Brightness 亮度 to a low
value. 到一个很低的值In principle, you can use dust in conjunction with particles to create realistic fire and smoke.
原则上,你可以把灰尘和粒子结合起来,创造出真实的火和烟。
犹豫不决[0. . 100% ]
This produces irregularities in the visible light, which can help to prevent unwanted banding or contouring in the visible light source.
这会在可见光中产生不规则的现象,这有助于防止可见光源中不必要的条带或轮廓。
With certain light source combinations, such as visible lights that overlap, you may find that the 24-bit picture depth of your output device is insufficient and it may display color gradients in large steps. This display problem is known as 对于某些光源组合,例如可见光的重叠,您可能会发现您的输出设备的24位图像深度不够,它可能在大的步骤中显示颜色梯度。这种显示问题称为contouring 轮廓. To avoid this problem, use the Dithering option to give the visible light irregularity and help to smooth the color graduations. .为了避免这个问题,使用抖动选项给可见光不规则和帮助平滑的颜色毕业使用渐变
 A visible light’s gradient. Left: Omni light;
right: Spot light. 可见光的渐变。左: 泛光灯; 右: 聚光灯
A visible light’s gradient. Left: Omni light;
right: Spot light. 可见光的渐变。左: 泛光灯; 右: 聚光灯颜色
Use Gradient allows for much more flexible creation of color- and brightness gradients.
使用渐变允许更灵活的创建颜色和亮度渐变。
Use Falloff, also in the Visibility tab, must be activated.
使用 Falloff,也在可见性标签,必须被激活。
NOTE: 注意:Intensity (General tab) will now also affect the brightness of the visible light!
强度(一般标签)现在也会影响可见光的亮度!
NOTE 2: 注二:If Use Gradient is not active, the gradient defined in the Details tab may not be applied.
如果“使用渐变”未激活,则可能不应用“详细信息”选项卡中定义的渐变。
添加剂
Enable this option if you want to mix the light beam additively with other light sources.
如果你想把光束和其他光源混合在一起,启用这个选项。
 Additive enabled. 启用添加剂 Additive enabled. 启用添加剂 |  Additive disabled. 禁用添加剂 Additive disabled. 禁用添加剂 |
适应亮度
This option prevents a light beam from being over-exposed. The brightness is reduced until the over-exposed effect disappears.
此选项可防止光束过度曝光。亮度降低直到过度曝光效果消失。
 Adapt Brightness enabled. 调整亮度 Adapt Brightness enabled. 调整亮度 |  Adapt Brightness disabled. 适应亮度禁用 Adapt Brightness disabled. 适应亮度禁用 |