 Physical Sky 物理天空Basic 基础Coord.Time and Location 时间及地点Sky 天空Sun 太阳Atmosphere 大气层Clouds 云彩Details 详情Volumetric Clouds 体积云Fog 雾Rainbow 彩虹Sunbeams 阳光Sky Objects 天空物体
Clouds
云彩
 Only 2D clouds are shown here. 这里只显示了二维云
In the Clouds tab you can edit the look of your 2D clouds (3D clouds can be edited in the Volumetric Clouds tab).
在“云”选项卡中,你可以编辑2D 云的外观(3D 云可以在“体积云”选项卡中编辑)。
A special method is used to project 2D clouds onto the celestial sphere to give a realistic impression of cloud cover that stretches across the entire firmament. Each cloud layer is created from the already well-known Noise types (see Noise 2D/3D under Channel Shaders). Here you will find a depiction of all types of Noise).
一种特殊的方法被用来将2 d 云投影到天球空间站上,以给出一个延伸到整个苍穹的云层的真实感。每个云层都是从已知的噪音类型中创建的(参见噪音2D/3D 下的通道着色器)。在这里你会发现一个描绘所有类型的噪音)。
You can create up to six layers of clouds, each of which can be edited individually. Each level (internally) can have its own altitude. This makes it possible to layer clouds over each other, even letting shadows be cast onto volumetric clouds or other scene objects.
您可以创建多达六个云层,每个云层都可以单独编辑。每个级别(内部)都有自己的高度。这使得将云层互相叠加成为可能,甚至可以将阴影投射到体积云或其他场景物体上。
2D clouds render much faster than 3D volumetric clouds. Since 2D clouds offer such a large number of settings, you can use them in place of 3D clouds in many cases. Your render farm will thank you and spit out rendered images in no time.
2 d 云渲染速度比3D 云渲染速度快得多。由于二维云提供了如此多的设置,所以在很多情况下你可以用它们来代替三维云。你的渲染场会感谢你,并且很快就会生成渲染图片。
Of course the position and noise structure of 2D clouds can be animated so you can create passing cloud formations and even animate clouds forming (Anim. Speed / 0).
当然,2D 云的位置和噪音结构可以动画,所以你可以创建通过云的形成,甚至动画云形成(Anim。速度/0)。
 1. Open / close level. 2. Make level visible /
invisible 1. 打开/关闭级别。2. 使级别可见/不可见
1. Open / close level. 2. Make level visible /
invisible 1. 打开/关闭级别。2. 使级别可见/不可见
Here you can see the settings for level 1. Each layer (each offers the same settings) can be opened by clicking on the arrow to the left of the eye icon. The levels can be turned on or off via the Levels 1-6 options.
这里你可以看到水平1的设置。每个图层(每个提供相同的设置)可以通过点击左眼图标的箭头打开。水平可以打开或关闭通过水平1-6选项。
You can copy a layer’s entire settings to another layer by simply dragging its preview image onto the preview image of the layer onto which you want to copy the settings.
您可以复制一个图层的整个设置到另一个图层,只需拖动它的预览图像到图层的预览图像上,你想要复制的设置。
罗洛夫
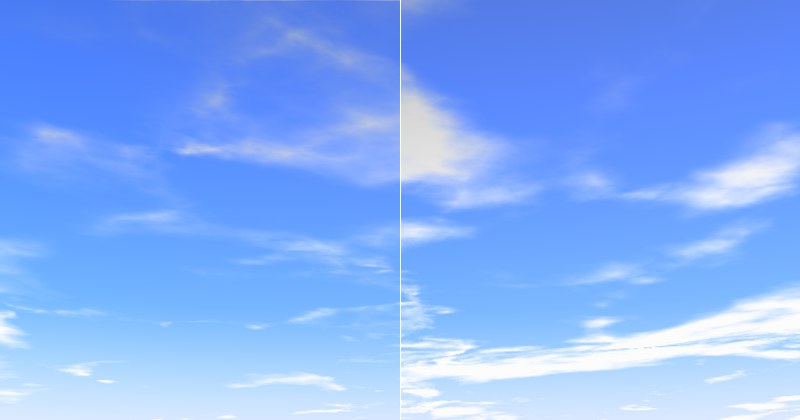
 Left, 左边,Rolloff 罗洛夫
deactivated (black gradient); right, 停用(黑色斜度) ;Rolloff 罗洛夫 default settings. 默认设置
Left, 左边,Rolloff 罗洛夫
deactivated (black gradient); right, 停用(黑色斜度) ;Rolloff 罗洛夫 default settings. 默认设置
This grayscale gradient causes the sky to fade to the cloud color near the horizon, thus giving the cloud cover a realistic look as it approaches the horizon.
这种灰度梯度使得天空在靠近地平线的地方褪去云彩的颜色,从而使云层在接近地平线时看起来更加真实。
The left side of the gradient represents the zenith, the right side of the horizon.
梯度的左边代表天顶,右边代表地平线。
Black=transparency; white=color of the clouds.
黑色 = 透明度; 白色 = 云彩的颜色。
投下阴影
Defines whether or not 2D Clouds should cast shadows.
定义二维云是否应该投射阴影。
Tip: 提示:
Layer 1
Layer 2
Layer 3
Layer 4
Layer 5
Layer 6
第一层第二层第三层第四层第五层第六层
2D Clouds can be made up of up to six cloud layers, each of which can be turned on or off separately. Each layer has its own set of parameters that are displayed in the Enable field.
2 d 云可以由多达6个云层组成,每个云层都可以单独开启或关闭。每个层都有自己的一组参数,这些参数显示在 Enable 字段中。
第1层
噪音
 A small selection of Noise types. 一个噪音类型的小选择
Here you can select the type of noise with which your 2D clouds should be created. By clicking on the button with the arrow on it (to the right of the noise name) you can open a window in which the different noise types can be viewed and selected. To the right of this button is the image preview for the cloud layer. By clicking on this preview image with the right mouse button, a menu with the following options will open:
在这里你可以选择你的2 d 云应该创建的噪音类型。通过点击带有箭头的按钮(噪音名称的右边) ,你可以打开一个窗口,在其中可以查看和选择不同的噪音类型。在这个按钮的右边是云层的图像预览。用鼠标右键点击这个预览图片,会打开一个菜单,其中包含以下选项:
You can deactivate the preview image by clicking on the small arrow to the left of the image.
您可以通过单击图像左侧的小箭头来停用预览图像。
另存为预置..。
Click on this button to save the current cloud layer as a preset. The following window will open:
点击这个按钮将当前的云层保存为一个预设。下面的窗口将打开:

Use this window to enter detailed information regarding your cloud layer. This info will then be visible in the Content Browser. You can find the presets here: Open Sky Presets … Presets/User/ Sky / Cloud Layers.
使用此窗口输入有关云层的详细信息。这些信息将在内容浏览器中可见。你可以在这里找到预设: 打开天空预设... 预设/用户/天空/云层。

To later load a cloud preset, simply drag it onto the cloud preview image in the Sky Manager.
稍后加载一个云预设,只需将其拖动到天空管理器中的云预览图像上。
颜色
Define the color of your cloud here; its color will be independent of the sun’s color or that of other sources of light. Only the cloud’s brightness will be adjusted to match the sun.
在这里定义你云彩的颜色; 它的颜色将独立于太阳的颜色或其他光源。只有云的亮度会被调整到与太阳相匹配。
高度[0.50000米]
 Three different types of noise at different
altitudes. 不同高度的三种不同类型的噪音
Three different types of noise at different
altitudes. 不同高度的三种不同类型的噪音
Set the height of each cloud layer. If you take a look out of the window you will notice that clouds often consist of several layers. Officially, clouds are classified by the World Meteorological Organization as; high cloud type, medium cloud type, and low cloud type. All of these clouds can be created in a scene using several cloud layers and varying types of noise.
设置每个云层的高度。如果你看看窗外,你会发现云层通常由几个层次组成。按照官方世界气象组织,云被分为高云型、中云型和低云型。所有这些云都可以在一个场景中使用多个云层和不同类型的噪音来创建。
Cirrus clouds can, for example, be placed on a layer that is higher (since they reach great heights in reality as well), and clouds that are darker, rain-filled, and more foreboding can be placed on a lower layer.
例如,体积云可以放置在较高的一层上(因为实际上它们也达到了很高的高度) ,而较暗、充满雨水和更具预兆的云可以放置在较低的一层上。
密度[0.5000% ]
 Left, low 左,低Density 密度
value; right, higher 价值; 右,更高Density 密度 value. 价值
Left, low 左,低Density 密度
value; right, higher 价值; 右,更高Density 密度 value. 价值
Simply put, Density defines the contrast of the clouds. If a low value is used, the clouds will be very transparent, especially towards the edges. The higher the value, the more planar and homogeneous the clouds will be.
简单地说,密度决定了云的对比度。如果使用一个较低的值,云将是非常透明的,特别是对边缘。值越高,云的平面和均匀度就越高。
保障范围[0. . 100% ]
 Left, low 左,低Coverage 覆盖范围
value; right, higher 价值; 右,更高Coverage 覆盖范围 value. 价值
Left, low 左,低Coverage 覆盖范围
value; right, higher 价值; 右,更高Coverage 覆盖范围 value. 价值
This is the most important cloud setting. With it you define the degree of cloud coverage. Very low values result in no cloud coverage; very high values result in a completely overcast sky.
这是最重要的云设置。通过它你可以定义云覆盖的程度。非常低的值导致没有云覆盖; 非常高的值导致完全阴天。
厚度[0.5000% ]
 Left, low 左,低Thickness 厚度
value; right, higher 价值; 右,更高Thickness 厚度 value. 价值
Left, low 左,低Thickness 厚度
value; right, higher 价值; 右,更高Thickness 厚度 value. 价值
Thickness is the measure of the degree to which the sunlight will be dispersed or absorbed. This can be equated with the lighting of the clouds by the sun. Lower values result in the clouds being brightened more by the sunlight, higher values result in darker clouds.
厚度是衡量太阳光被分散或吸收的程度。这可以等同于太阳对云层的照明。较低的数值导致云层被阳光照得更亮,较高的数值导致云层颜色更深。
透明度[0. . 100% ]
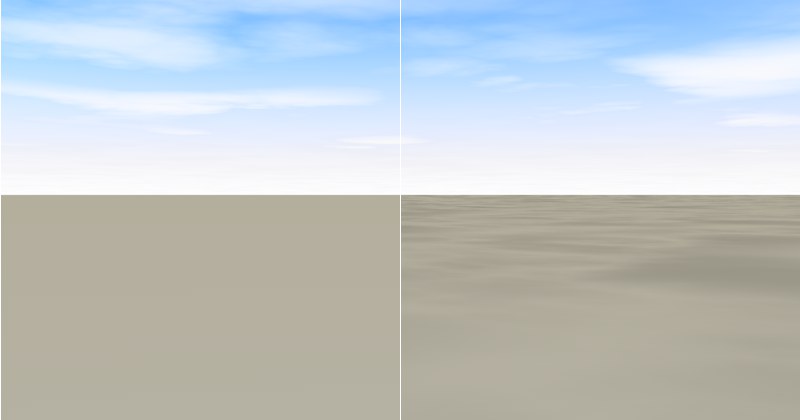 Left, high 左高Transparency 透明度 value; right, low 价值; 右,低Transparency 透明度
value. 价值
Left, high 左高Transparency 透明度 value; right, low 价值; 右,低Transparency 透明度
value. 价值
Transparency regulates the degree to which 2D clouds cast shadows onto volumetric clouds and/or other objects in the scene. Enter a value of 100% if no shadows should be cast.
透明度调节2D 云彩在场景中体积云和/或其他物体上投射阴影的程度。如果不应该投射阴影,则输入100% 的值。
If, in addition to the sun, you add light sources that cast shadows, make sure they are placed at a height greater than 10,000m (for the calculation of shadows on 2D clouds a layer (internal), located at this height, is used). 如果,除了太阳,你添加了投射阴影的光源,确保它们被放置在一个大于10,000米的高度(为了计算2D 云层上的阴影,使用了一层(内部) ,位于这个高度)Anim. Speed [-∞ . . + ∞% ]
The animation speed defined here relates to the noise structure – not the position of the clouds! The higher the value, the more the clouds will billow. You have probably seen slow motion clips of billowing clouds literally being created out of the blue; this setting lets you create a similar effect. If you also animate the cloud position (use the Pos. N-S and Pos. W-E settings), the result will be very realistic.
这里定义的动画速度与噪音结构有关——而不是云的位置!数值越高,云层越会翻滚。你可能已经看到了慢动作片段的巨浪云从字面上被创造出来的蓝色; 这个设置让你创造一个类似的效果。如果您还动画云的位置(使用 Pos。N-S 和 Pos。设置) ,结果会非常真实。
偏移[-∞ . . + ∞]
This setting lets you define a different starting point for the billowing defined in Anim. Speed. Let’s assume you have animated a cloud formation. Unfortunately, a part of the cloud formation will cover the sun at the very start of the animation. To remedy this, simply enter a different Offset value to alter the start of the animation.
这个设置可以让你定义一个不同的起点,为在 Anim 中定义的巨浪。速度。让我们假设您已经制作了一个云形成动画。不幸的是,在动画开始的时候,部分云层会遮住太阳。要解决这个问题,只需输入一个不同的偏移量值来改变动画的开始。
标度 N-S [1. . + ∞% ] W-E [1. . + ∞% ]
 Clouds scaled in one direction only. 云朵只朝一个方向扩展
These settings let you scale the noise pattern in the North-South (N-S) or West-East (W-E) directions. If your cloud formations are too small or too large, simply scale them by scaling these settings equally. You can easily create long, thin, stretched cloud formations by scaling them in one direction only.
这些设置使您可以在南北或东西方向上缩放噪声模式。如果你的云层太小或者太大,简单地按比例缩放这些设置。你可以很容易地创建长,薄,伸展云的形成通过缩放他们在一个方向只。
Pos. N-S[-∞..+∞m]
W-E[-∞..+∞m]
Pos. N-S [-∞ . . + ∞ m ] W-E [-∞ . . + ∞ m ]
Use these settings to move your clouds in the North-South (N-S) or West-East (W-E) directions. Animate these settings if you want your clouds to move across the sky. If you also want the clouds to change their structure as they move, set Anim. Speed to a value greater than 0.
使用这些设置在南北或东西方向移动你的云。如果您希望云彩在天空中移动,那么可以动画这些设置。如果你还想让云移动的时候改变它们的结构,设置 Anim。速度为大于0的值。
第2层
噪音
A small selection of Noise types. 一个噪音类型的小选择
Here you can select the type of noise with which your 2D clouds should be created. By clicking on the button with the arrow on it (to the right of the noise name) you can open a window in which the different noise types can be viewed and selected. To the right of this button is the image preview for the cloud layer. By clicking on this preview image with the right mouse button, a menu with the following options will open:
在这里你可以选择你的2 d 云应该创建的噪音类型。通过点击带有箭头的按钮(噪音名称的右边) ,你可以打开一个窗口,在其中可以查看和选择不同的噪音类型。在这个按钮的右边是云层的图像预览。用鼠标右键点击这个预览图片,会打开一个菜单,其中包含以下选项:
You can deactivate the preview image by clicking on the small arrow to the left of the image.
您可以通过单击图像左侧的小箭头来停用预览图像。
另存为预置..。
Click on this button to save the current cloud layer as a preset. The following window will open:
点击这个按钮将当前的云层保存为一个预设。下面的窗口将打开:
Use this window to enter detailed information regarding your cloud layer. This info will then be visible in the Content Browser. You can find the presets here: Open Sky Presets … Presets/User/ Sky / Cloud Layers.
使用此窗口输入有关云层的详细信息。这些信息将在内容浏览器中可见。你可以在这里找到预设: 打开天空预设... 预设/用户/天空/云层。
To later load a cloud preset, simply drag it onto the cloud preview image in the Sky Manager.
稍后加载一个云预设,只需将其拖动到天空管理器中的云预览图像上。
颜色
Define the color of your cloud here; its color will be independent of the sun’s color or that of other sources of light. Only the cloud’s brightness will be adjusted to match the sun.
在这里定义你云彩的颜色; 它的颜色将独立于太阳的颜色或其他光源。只有云的亮度会被调整到与太阳相匹配。
高度[0.50000米]
Three different types of noise at different
altitudes. 不同高度的三种不同类型的噪音
Set the height of each cloud layer. If you take a look out of the window you will notice that clouds often consist of several layers. Officially, clouds are classified by the World Meteorological Organization as; high cloud type, medium cloud type, and low cloud type. All of these clouds can be created in a scene using several cloud layers and varying types of noise.
设置每个云层的高度。如果你看看窗外,你会发现云层通常由几个层次组成。按照官方世界气象组织,云被分为高云型、中云型和低云型。所有这些云都可以在一个场景中使用多个云层和不同类型的噪音来创建。
Cirrus clouds can, for example, be placed on a layer that is higher (since they reach great heights in reality as well), and clouds that are darker, rain-filled, and more foreboding can be placed on a lower layer.
例如,体积云可以放置在较高的一层上(因为实际上它们也达到了很高的高度) ,而较暗、充满雨水和更具预兆的云可以放置在较低的一层上。
密度[0.5000% ]
Left, low 左,低Density 密度
value; right, higher 价值; 右,更高Density 密度 value. 价值
Simply put, Density defines the contrast of the clouds. If a low value is used, the clouds will be very transparent, especially towards the edges. The higher the value, the more planar and homogeneous the clouds will be.
简单地说,密度决定了云的对比度。如果使用一个较低的值,云将是非常透明的,特别是对边缘。值越高,云的平面和均匀度就越高。
保障范围[0. . 100% ]
Left, low 左,低Coverage 覆盖范围
value; right, higher 价值; 右,更高Coverage 覆盖范围 value. 价值
This is the most important cloud setting. With it you define the degree of cloud coverage. Very low values result in no cloud coverage; very high values result in a completely overcast sky.
这是最重要的云设置。通过它你可以定义云覆盖的程度。非常低的值导致没有云覆盖; 非常高的值导致完全阴天。
厚度[0.5000% ]
Left, low 左,低Thickness 厚度
value; right, higher 价值; 右,更高Thickness 厚度 value. 价值
Thickness is the measure of the degree to which the sunlight will be dispersed or absorbed. This can be equated with the lighting of the clouds by the sun. Lower values result in the clouds being brightened more by the sunlight, higher values result in darker clouds.
厚度是衡量太阳光被分散或吸收的程度。这可以等同于太阳对云层的照明。较低的数值导致云层被阳光照得更亮,较高的数值导致云层颜色更深。
透明度[0. . 100% ]
Left, high 左高Transparency 透明度 value; right, low 价值; 右,低Transparency 透明度
value. 价值
Transparency regulates the degree to which 2D clouds cast shadows onto volumetric clouds and/or other objects in the scene. Enter a value of 100% if no shadows should be cast.
透明度调节2D 云彩在场景中体积云和/或其他物体上投射阴影的程度。如果不应该投射阴影,则输入100% 的值。
If, in addition to the sun, you add light sources that cast shadows, make sure they are placed at a height greater than 10,000m (for the calculation of shadows on 2D clouds a layer (internal), located at this height, is used). 如果,除了太阳,你添加了投射阴影的光源,确保它们被放置在一个大于10,000米的高度(为了计算2D 云层上的阴影,使用了一层(内部) ,位于这个高度)Anim. Speed [-∞ . . + ∞% ]
The animation speed defined here relates to the noise structure – not the position of the clouds! The higher the value, the more the clouds will billow. You have probably seen slow motion clips of billowing clouds literally being created out of the blue; this setting lets you create a similar effect. If you also animate the cloud position (use the Pos. N-S and Pos. W-E settings), the result will be very realistic.
这里定义的动画速度与噪音结构有关——而不是云的位置!数值越高,云层越会翻滚。你可能已经看到了慢动作片段的巨浪云从字面上被创造出来的蓝色; 这个设置让你创造一个类似的效果。如果您还动画云的位置(使用 Pos。N-S 和 Pos。设置) ,结果会非常真实。
偏移[-∞ . . + ∞]
This setting lets you define a different starting point for the billowing defined in Anim. Speed. Let’s assume you have animated a cloud formation. Unfortunately, a part of the cloud formation will cover the sun at the very start of the animation. To remedy this, simply enter a different Offset value to alter the start of the animation.
这个设置可以让你定义一个不同的起点,为在 Anim 中定义的巨浪。速度。让我们假设您已经制作了一个云形成动画。不幸的是,在动画开始的时候,部分云层会遮住太阳。要解决这个问题,只需输入一个不同的偏移量值来改变动画的开始。
标度 N-S [1. . + ∞% ] W-E [1. . + ∞% ]
Clouds scaled in one direction only. 云朵只朝一个方向扩展
These settings let you scale the noise pattern in the North-South (N-S) or West-East (W-E) directions. If your cloud formations are too small or too large, simply scale them by scaling these settings equally. You can easily create long, thin, stretched cloud formations by scaling them in one direction only.
这些设置使您可以在南北或东西方向上缩放噪声模式。如果你的云层太小或者太大,简单地按比例缩放这些设置。你可以很容易地创建长,薄,伸展云的形成通过缩放他们在一个方向只。
Pos. N-S[-∞..+∞m]
W-E[-∞..+∞m]
Pos. N-S [-∞ . . + ∞ m ] W-E [-∞ . . + ∞ m ]
Use these settings to move your clouds in the North-South (N-S) or West-East (W-E) directions. Animate these settings if you want your clouds to move across the sky. If you also want the clouds to change their structure as they move, set Anim. Speed to a value greater than 0.
使用这些设置在南北或东西方向移动你的云。如果您希望云彩在天空中移动,那么可以动画这些设置。如果你还想让云移动的时候改变它们的结构,设置 Anim。速度为大于0的值。
第3层
噪音
A small selection of Noise types. 一个噪音类型的小选择
Here you can select the type of noise with which your 2D clouds should be created. By clicking on the button with the arrow on it (to the right of the noise name) you can open a window in which the different noise types can be viewed and selected. To the right of this button is the image preview for the cloud layer. By clicking on this preview image with the right mouse button, a menu with the following options will open:
在这里你可以选择你的2 d 云应该创建的噪音类型。通过点击带有箭头的按钮(噪音名称的右边) ,你可以打开一个窗口,在其中可以查看和选择不同的噪音类型。在这个按钮的右边是云层的图像预览。用鼠标右键点击这个预览图片,会打开一个菜单,其中包含以下选项:
You can deactivate the preview image by clicking on the small arrow to the left of the image.
您可以通过单击图像左侧的小箭头来停用预览图像。
另存为预置..。
Click on this button to save the current cloud layer as a preset. The following window will open:
点击这个按钮将当前的云层保存为一个预设。下面的窗口将打开:
Use this window to enter detailed information regarding your cloud layer. This info will then be visible in the Content Browser. You can find the presets here: Open Sky Presets … Presets/User/ Sky / Cloud Layers.
使用此窗口输入有关云层的详细信息。这些信息将在内容浏览器中可见。你可以在这里找到预设: 打开天空预设... 预设/用户/天空/云层。
To later load a cloud preset, simply drag it onto the cloud preview image in the Sky Manager.
稍后加载一个云预设,只需将其拖动到天空管理器中的云预览图像上。
颜色
Define the color of your cloud here; its color will be independent of the sun’s color or that of other sources of light. Only the cloud’s brightness will be adjusted to match the sun.
在这里定义你云彩的颜色; 它的颜色将独立于太阳的颜色或其他光源。只有云的亮度会被调整到与太阳相匹配。
高度[0.50000米]
Three different types of noise at different
altitudes. 不同高度的三种不同类型的噪音
Set the height of each cloud layer. If you take a look out of the window you will notice that clouds often consist of several layers. Officially, clouds are classified by the World Meteorological Organization as; high cloud type, medium cloud type, and low cloud type. All of these clouds can be created in a scene using several cloud layers and varying types of noise.
设置每个云层的高度。如果你看看窗外,你会发现云层通常由几个层次组成。按照官方世界气象组织,云被分为高云型、中云型和低云型。所有这些云都可以在一个场景中使用多个云层和不同类型的噪音来创建。
Cirrus clouds can, for example, be placed on a layer that is higher (since they reach great heights in reality as well), and clouds that are darker, rain-filled, and more foreboding can be placed on a lower layer.
例如,体积云可以放置在较高的一层上(因为实际上它们也达到了很高的高度) ,而较暗、充满雨水和更具预兆的云可以放置在较低的一层上。
密度[0.5000% ]
Left, low 左,低Density 密度
value; right, higher 价值; 右,更高Density 密度 value. 价值
Simply put, Density defines the contrast of the clouds. If a low value is used, the clouds will be very transparent, especially towards the edges. The higher the value, the more planar and homogeneous the clouds will be.
简单地说,密度决定了云的对比度。如果使用一个较低的值,云将是非常透明的,特别是对边缘。值越高,云的平面和均匀度就越高。
保障范围[0. . 100% ]
Left, low 左,低Coverage 覆盖范围
value; right, higher 价值; 右,更高Coverage 覆盖范围 value. 价值
This is the most important cloud setting. With it you define the degree of cloud coverage. Very low values result in no cloud coverage; very high values result in a completely overcast sky.
这是最重要的云设置。通过它你可以定义云覆盖的程度。非常低的值导致没有云覆盖; 非常高的值导致完全阴天。
厚度[0.5000% ]
Left, low 左,低Thickness 厚度
value; right, higher 价值; 右,更高Thickness 厚度 value. 价值
Thickness is the measure of the degree to which the sunlight will be dispersed or absorbed. This can be equated with the lighting of the clouds by the sun. Lower values result in the clouds being brightened more by the sunlight, higher values result in darker clouds.
厚度是衡量太阳光被分散或吸收的程度。这可以等同于太阳对云层的照明。较低的数值导致云层被阳光照得更亮,较高的数值导致云层颜色更深。
透明度[0. . 100% ]
Left, high 左高Transparency 透明度 value; right, low 价值; 右,低Transparency 透明度
value. 价值
Transparency regulates the degree to which 2D clouds cast shadows onto volumetric clouds and/or other objects in the scene. Enter a value of 100% if no shadows should be cast.
透明度调节2D 云彩在场景中体积云和/或其他物体上投射阴影的程度。如果不应该投射阴影,则输入100% 的值。
If, in addition to the sun, you add light sources that cast shadows, make sure they are placed at a height greater than 10,000m (for the calculation of shadows on 2D clouds a layer (internal), located at this height, is used). 如果,除了太阳,你添加了投射阴影的光源,确保它们被放置在一个大于10,000米的高度(为了计算2D 云层上的阴影,使用了一层(内部) ,位于这个高度)Anim. Speed [-∞ . . + ∞% ]
The animation speed defined here relates to the noise structure – not the position of the clouds! The higher the value, the more the clouds will billow. You have probably seen slow motion clips of billowing clouds literally being created out of the blue; this setting lets you create a similar effect. If you also animate the cloud position (use the Pos. N-S and Pos. W-E settings), the result will be very realistic.
这里定义的动画速度与噪音结构有关——而不是云的位置!数值越高,云层越会翻滚。你可能已经看到了慢动作片段的巨浪云从字面上被创造出来的蓝色; 这个设置让你创造一个类似的效果。如果您还动画云的位置(使用 Pos。N-S 和 Pos。设置) ,结果会非常真实。
偏移[-∞ . . + ∞]
This setting lets you define a different starting point for the billowing defined in Anim. Speed. Let’s assume you have animated a cloud formation. Unfortunately, a part of the cloud formation will cover the sun at the very start of the animation. To remedy this, simply enter a different Offset value to alter the start of the animation.
这个设置可以让你定义一个不同的起点,为在 Anim 中定义的巨浪。速度。让我们假设您已经制作了一个云形成动画。不幸的是,在动画开始的时候,部分云层会遮住太阳。要解决这个问题,只需输入一个不同的偏移量值来改变动画的开始。
标度 N-S [1. . + ∞% ] W-E [1. . + ∞% ]
Clouds scaled in one direction only. 云朵只朝一个方向扩展
These settings let you scale the noise pattern in the North-South (N-S) or West-East (W-E) directions. If your cloud formations are too small or too large, simply scale them by scaling these settings equally. You can easily create long, thin, stretched cloud formations by scaling them in one direction only.
这些设置使您可以在南北或东西方向上缩放噪声模式。如果你的云层太小或者太大,简单地按比例缩放这些设置。你可以很容易地创建长,薄,伸展云的形成通过缩放他们在一个方向只。
Pos. N-S[-∞..+∞m]
W-E[-∞..+∞m]
Pos. N-S [-∞ . . + ∞ m ] W-E [-∞ . . + ∞ m ]
Use these settings to move your clouds in the North-South (N-S) or West-East (W-E) directions. Animate these settings if you want your clouds to move across the sky. If you also want the clouds to change their structure as they move, set Anim. Speed to a value greater than 0.
使用这些设置在南北或东西方向移动你的云。如果您希望云彩在天空中移动,那么可以动画这些设置。如果你还想让云移动的时候改变它们的结构,设置 Anim。速度为大于0的值。
第4层
噪音
A small selection of Noise types. 一个噪音类型的小选择
Here you can select the type of noise with which your 2D clouds should be created. By clicking on the button with the arrow on it (to the right of the noise name) you can open a window in which the different noise types can be viewed and selected. To the right of this button is the image preview for the cloud layer. By clicking on this preview image with the right mouse button, a menu with the following options will open:
在这里你可以选择你的2 d 云应该创建的噪音类型。通过点击带有箭头的按钮(噪音名称的右边) ,你可以打开一个窗口,在其中可以查看和选择不同的噪音类型。在这个按钮的右边是云层的图像预览。用鼠标右键点击这个预览图片,会打开一个菜单,其中包含以下选项:
You can deactivate the preview image by clicking on the small arrow to the left of the image.
您可以通过单击图像左侧的小箭头来停用预览图像。
另存为预置..。
Click on this button to save the current cloud layer as a preset. The following window will open:
点击这个按钮将当前的云层保存为一个预设。下面的窗口将打开:
Use this window to enter detailed information regarding your cloud layer. This info will then be visible in the Content Browser. You can find the presets here: Open Sky Presets … Presets/User/ Sky / Cloud Layers.
使用此窗口输入有关云层的详细信息。这些信息将在内容浏览器中可见。你可以在这里找到预设: 打开天空预设... 预设/用户/天空/云层。
To later load a cloud preset, simply drag it onto the cloud preview image in the Sky Manager.
稍后加载一个云预设,只需将其拖动到天空管理器中的云预览图像上。
颜色
Define the color of your cloud here; its color will be independent of the sun’s color or that of other sources of light. Only the cloud’s brightness will be adjusted to match the sun.
在这里定义你云彩的颜色; 它的颜色将独立于太阳的颜色或其他光源。只有云的亮度会被调整到与太阳相匹配。
高度[0.50000米]
Three different types of noise at different
altitudes. 不同高度的三种不同类型的噪音
Set the height of each cloud layer. If you take a look out of the window you will notice that clouds often consist of several layers. Officially, clouds are classified by the World Meteorological Organization as; high cloud type, medium cloud type, and low cloud type. All of these clouds can be created in a scene using several cloud layers and varying types of noise.
设置每个云层的高度。如果你看看窗外,你会发现云层通常由几个层次组成。按照官方世界气象组织,云被分为高云型、中云型和低云型。所有这些云都可以在一个场景中使用多个云层和不同类型的噪音来创建。
Cirrus clouds can, for example, be placed on a layer that is higher (since they reach great heights in reality as well), and clouds that are darker, rain-filled, and more foreboding can be placed on a lower layer.
例如,体积云可以放置在较高的一层上(因为实际上它们也达到了很高的高度) ,而较暗、充满雨水和更具预兆的云可以放置在较低的一层上。
密度[0.5000% ]
Left, low 左,低Density 密度
value; right, higher 价值; 右,更高Density 密度 value. 价值
Simply put, Density defines the contrast of the clouds. If a low value is used, the clouds will be very transparent, especially towards the edges. The higher the value, the more planar and homogeneous the clouds will be.
简单地说,密度决定了云的对比度。如果使用一个较低的值,云将是非常透明的,特别是对边缘。值越高,云的平面和均匀度就越高。
保障范围[0. . 100% ]
Left, low 左,低Coverage 覆盖范围
value; right, higher 价值; 右,更高Coverage 覆盖范围 value. 价值
This is the most important cloud setting. With it you define the degree of cloud coverage. Very low values result in no cloud coverage; very high values result in a completely overcast sky.
这是最重要的云设置。通过它你可以定义云覆盖的程度。非常低的值导致没有云覆盖; 非常高的值导致完全阴天。
厚度[0.5000% ]
Left, low 左,低Thickness 厚度
value; right, higher 价值; 右,更高Thickness 厚度 value. 价值
Thickness is the measure of the degree to which the sunlight will be dispersed or absorbed. This can be equated with the lighting of the clouds by the sun. Lower values result in the clouds being brightened more by the sunlight, higher values result in darker clouds.
厚度是衡量太阳光被分散或吸收的程度。这可以等同于太阳对云层的照明。较低的数值导致云层被阳光照得更亮,较高的数值导致云层颜色更深。
透明度[0. . 100% ]
Left, high 左高Transparency 透明度 value; right, low 价值; 右,低Transparency 透明度
value. 价值
Transparency regulates the degree to which 2D clouds cast shadows onto volumetric clouds and/or other objects in the scene. Enter a value of 100% if no shadows should be cast.
透明度调节2D 云彩在场景中体积云和/或其他物体上投射阴影的程度。如果不应该投射阴影,则输入100% 的值。
If, in addition to the sun, you add light sources that cast shadows, make sure they are placed at a height greater than 10,000m (for the calculation of shadows on 2D clouds a layer (internal), located at this height, is used). 如果,除了太阳,你添加了投射阴影的光源,确保它们被放置在一个大于10,000米的高度(为了计算2D 云层上的阴影,使用了一层(内部) ,位于这个高度)Anim. Speed [-∞ . . + ∞% ]
The animation speed defined here relates to the noise structure – not the position of the clouds! The higher the value, the more the clouds will billow. You have probably seen slow motion clips of billowing clouds literally being created out of the blue; this setting lets you create a similar effect. If you also animate the cloud position (use the Pos. N-S and Pos. W-E settings), the result will be very realistic.
这里定义的动画速度与噪音结构有关——而不是云的位置!数值越高,云层越会翻滚。你可能已经看到了慢动作片段的巨浪云从字面上被创造出来的蓝色; 这个设置让你创造一个类似的效果。如果您还动画云的位置(使用 Pos。N-S 和 Pos。设置) ,结果会非常真实。
偏移[-∞ . . + ∞]
This setting lets you define a different starting point for the billowing defined in Anim. Speed. Let’s assume you have animated a cloud formation. Unfortunately, a part of the cloud formation will cover the sun at the very start of the animation. To remedy this, simply enter a different Offset value to alter the start of the animation.
这个设置可以让你定义一个不同的起点,为在 Anim 中定义的巨浪。速度。让我们假设您已经制作了一个云形成动画。不幸的是,在动画开始的时候,部分云层会遮住太阳。要解决这个问题,只需输入一个不同的偏移量值来改变动画的开始。
标度 N-S [1. . + ∞% ] W-E [1. . + ∞% ]
Clouds scaled in one direction only. 云朵只朝一个方向扩展
These settings let you scale the noise pattern in the North-South (N-S) or West-East (W-E) directions. If your cloud formations are too small or too large, simply scale them by scaling these settings equally. You can easily create long, thin, stretched cloud formations by scaling them in one direction only.
这些设置使您可以在南北或东西方向上缩放噪声模式。如果你的云层太小或者太大,简单地按比例缩放这些设置。你可以很容易地创建长,薄,伸展云的形成通过缩放他们在一个方向只。
Pos. N-S[-∞..+∞m]
W-E[-∞..+∞m]
Pos. N-S [-∞ . . + ∞ m ] W-E [-∞ . . + ∞ m ]
Use these settings to move your clouds in the North-South (N-S) or West-East (W-E) directions. Animate these settings if you want your clouds to move across the sky. If you also want the clouds to change their structure as they move, set Anim. Speed to a value greater than 0.
使用这些设置在南北或东西方向移动你的云。如果您希望云彩在天空中移动,那么可以动画这些设置。如果你还想让云移动的时候改变它们的结构,设置 Anim。速度为大于0的值。
第5层
噪音
A small selection of Noise types. 一个噪音类型的小选择
Here you can select the type of noise with which your 2D clouds should be created. By clicking on the button with the arrow on it (to the right of the noise name) you can open a window in which the different noise types can be viewed and selected. To the right of this button is the image preview for the cloud layer. By clicking on this preview image with the right mouse button, a menu with the following options will open:
在这里你可以选择你的2 d 云应该创建的噪音类型。通过点击带有箭头的按钮(噪音名称的右边) ,你可以打开一个窗口,在其中可以查看和选择不同的噪音类型。在这个按钮的右边是云层的图像预览。用鼠标右键点击这个预览图片,会打开一个菜单,其中包含以下选项:
You can deactivate the preview image by clicking on the small arrow to the left of the image.
您可以通过单击图像左侧的小箭头来停用预览图像。
另存为预置..。
Click on this button to save the current cloud layer as a preset. The following window will open:
点击这个按钮将当前的云层保存为一个预设。下面的窗口将打开:
Use this window to enter detailed information regarding your cloud layer. This info will then be visible in the Content Browser. You can find the presets here: Open Sky Presets … Presets/User/ Sky / Cloud Layers.
使用此窗口输入有关云层的详细信息。这些信息将在内容浏览器中可见。你可以在这里找到预设: 打开天空预设... 预设/用户/天空/云层。
To later load a cloud preset, simply drag it onto the cloud preview image in the Sky Manager.
稍后加载一个云预设,只需将其拖动到天空管理器中的云预览图像上。
颜色
Define the color of your cloud here; its color will be independent of the sun’s color or that of other sources of light. Only the cloud’s brightness will be adjusted to match the sun.
在这里定义你云彩的颜色; 它的颜色将独立于太阳的颜色或其他光源。只有云的亮度会被调整到与太阳相匹配。
高度[0.50000米]
Three different types of noise at different
altitudes. 不同高度的三种不同类型的噪音
Set the height of each cloud layer. If you take a look out of the window you will notice that clouds often consist of several layers. Officially, clouds are classified by the World Meteorological Organization as; high cloud type, medium cloud type, and low cloud type. All of these clouds can be created in a scene using several cloud layers and varying types of noise.
设置每个云层的高度。如果你看看窗外,你会发现云层通常由几个层次组成。按照官方世界气象组织,云被分为高云型、中云型和低云型。所有这些云都可以在一个场景中使用多个云层和不同类型的噪音来创建。
Cirrus clouds can, for example, be placed on a layer that is higher (since they reach great heights in reality as well), and clouds that are darker, rain-filled, and more foreboding can be placed on a lower layer.
例如,体积云可以放置在较高的一层上(因为实际上它们也达到了很高的高度) ,而较暗、充满雨水和更具预兆的云可以放置在较低的一层上。
密度[0.5000% ]
Left, low 左,低Density 密度
value; right, higher 价值; 右,更高Density 密度 value. 价值
Simply put, Density defines the contrast of the clouds. If a low value is used, the clouds will be very transparent, especially towards the edges. The higher the value, the more planar and homogeneous the clouds will be.
简单地说,密度决定了云的对比度。如果使用一个较低的值,云将是非常透明的,特别是对边缘。值越高,云的平面和均匀度就越高。
保障范围[0. . 100% ]
Left, low 左,低Coverage 覆盖范围
value; right, higher 价值; 右,更高Coverage 覆盖范围 value. 价值
This is the most important cloud setting. With it you define the degree of cloud coverage. Very low values result in no cloud coverage; very high values result in a completely overcast sky.
这是最重要的云设置。通过它你可以定义云覆盖的程度。非常低的值导致没有云覆盖; 非常高的值导致完全阴天。
厚度[0.5000% ]
Left, low 左,低Thickness 厚度
value; right, higher 价值; 右,更高Thickness 厚度 value. 价值
Thickness is the measure of the degree to which the sunlight will be dispersed or absorbed. This can be equated with the lighting of the clouds by the sun. Lower values result in the clouds being brightened more by the sunlight, higher values result in darker clouds.
厚度是衡量太阳光被分散或吸收的程度。这可以等同于太阳对云层的照明。较低的数值导致云层被阳光照得更亮,较高的数值导致云层颜色更深。
透明度[0. . 100% ]
Left, high 左高Transparency 透明度 value; right, low 价值; 右,低Transparency 透明度
value. 价值
Transparency regulates the degree to which 2D clouds cast shadows onto volumetric clouds and/or other objects in the scene. Enter a value of 100% if no shadows should be cast.
透明度调节2D 云彩在场景中体积云和/或其他物体上投射阴影的程度。如果不应该投射阴影,则输入100% 的值。
If, in addition to the sun, you add light sources that cast shadows, make sure they are placed at a height greater than 10,000m (for the calculation of shadows on 2D clouds a layer (internal), located at this height, is used). 如果,除了太阳,你添加了投射阴影的光源,确保它们被放置在一个大于10,000米的高度(为了计算2D 云层上的阴影,使用了一层(内部) ,位于这个高度)Anim. Speed [-∞ . . + ∞% ]
The animation speed defined here relates to the noise structure – not the position of the clouds! The higher the value, the more the clouds will billow. You have probably seen slow motion clips of billowing clouds literally being created out of the blue; this setting lets you create a similar effect. If you also animate the cloud position (use the Pos. N-S and Pos. W-E settings), the result will be very realistic.
这里定义的动画速度与噪音结构有关——而不是云的位置!数值越高,云层越会翻滚。你可能已经看到了慢动作片段的巨浪云从字面上被创造出来的蓝色; 这个设置让你创造一个类似的效果。如果您还动画云的位置(使用 Pos。N-S 和 Pos。设置) ,结果会非常真实。
偏移[-∞ . . + ∞]
This setting lets you define a different starting point for the billowing defined in Anim. Speed. Let’s assume you have animated a cloud formation. Unfortunately, a part of the cloud formation will cover the sun at the very start of the animation. To remedy this, simply enter a different Offset value to alter the start of the animation.
这个设置可以让你定义一个不同的起点,为在 Anim 中定义的巨浪。速度。让我们假设您已经制作了一个云形成动画。不幸的是,在动画开始的时候,部分云层会遮住太阳。要解决这个问题,只需输入一个不同的偏移量值来改变动画的开始。
标度 N-S [1. . + ∞% ] W-E [1. . + ∞% ]
Clouds scaled in one direction only. 云朵只朝一个方向扩展
These settings let you scale the noise pattern in the North-South (N-S) or West-East (W-E) directions. If your cloud formations are too small or too large, simply scale them by scaling these settings equally. You can easily create long, thin, stretched cloud formations by scaling them in one direction only.
这些设置使您可以在南北或东西方向上缩放噪声模式。如果你的云层太小或者太大,简单地按比例缩放这些设置。你可以很容易地创建长,薄,伸展云的形成通过缩放他们在一个方向只。
Pos. N-S[-∞..+∞m]
W-E[-∞..+∞m]
Pos. N-S [-∞ . . + ∞ m ] W-E [-∞ . . + ∞ m ]
Use these settings to move your clouds in the North-South (N-S) or West-East (W-E) directions. Animate these settings if you want your clouds to move across the sky. If you also want the clouds to change their structure as they move, set Anim. Speed to a value greater than 0.
使用这些设置在南北或东西方向移动你的云。如果您希望云彩在天空中移动,那么可以动画这些设置。如果你还想让云移动的时候改变它们的结构,设置 Anim。速度为大于0的值。
第6层
噪音
A small selection of Noise types. 一个噪音类型的小选择
Here you can select the type of noise with which your 2D clouds should be created. By clicking on the button with the arrow on it (to the right of the noise name) you can open a window in which the different noise types can be viewed and selected. To the right of this button is the image preview for the cloud layer. By clicking on this preview image with the right mouse button, a menu with the following options will open:
在这里你可以选择你的2 d 云应该创建的噪音类型。通过点击带有箭头的按钮(噪音名称的右边) ,你可以打开一个窗口,在其中可以查看和选择不同的噪音类型。在这个按钮的右边是云层的图像预览。用鼠标右键点击这个预览图片,会打开一个菜单,其中包含以下选项:
You can deactivate the preview image by clicking on the small arrow to the left of the image.
您可以通过单击图像左侧的小箭头来停用预览图像。
另存为预置..。
Click on this button to save the current cloud layer as a preset. The following window will open:
点击这个按钮将当前的云层保存为一个预设。下面的窗口将打开:
Use this window to enter detailed information regarding your cloud layer. This info will then be visible in the Content Browser. You can find the presets here: Open Sky Presets … Presets/User/ Sky / Cloud Layers.
使用此窗口输入有关云层的详细信息。这些信息将在内容浏览器中可见。你可以在这里找到预设: 打开天空预设... 预设/用户/天空/云层。
To later load a cloud preset, simply drag it onto the cloud preview image in the Sky Manager.
稍后加载一个云预设,只需将其拖动到天空管理器中的云预览图像上。
颜色
Define the color of your cloud here; its color will be independent of the sun’s color or that of other sources of light. Only the cloud’s brightness will be adjusted to match the sun.
在这里定义你云彩的颜色; 它的颜色将独立于太阳的颜色或其他光源。只有云的亮度会被调整到与太阳相匹配。
高度[0.50000米]
Three different types of noise at different
altitudes. 不同高度的三种不同类型的噪音
Set the height of each cloud layer. If you take a look out of the window you will notice that clouds often consist of several layers. Officially, clouds are classified by the World Meteorological Organization as; high cloud type, medium cloud type, and low cloud type. All of these clouds can be created in a scene using several cloud layers and varying types of noise.
设置每个云层的高度。如果你看看窗外,你会发现云层通常由几个层次组成。按照官方世界气象组织,云被分为高云型、中云型和低云型。所有这些云都可以在一个场景中使用多个云层和不同类型的噪音来创建。
Cirrus clouds can, for example, be placed on a layer that is higher (since they reach great heights in reality as well), and clouds that are darker, rain-filled, and more foreboding can be placed on a lower layer.
例如,体积云可以放置在较高的一层上(因为实际上它们也达到了很高的高度) ,而较暗、充满雨水和更具预兆的云可以放置在较低的一层上。
密度[0.5000% ]
Left, low 左,低Density 密度
value; right, higher 价值; 右,更高Density 密度 value. 价值
Simply put, Density defines the contrast of the clouds. If a low value is used, the clouds will be very transparent, especially towards the edges. The higher the value, the more planar and homogeneous the clouds will be.
简单地说,密度决定了云的对比度。如果使用一个较低的值,云将是非常透明的,特别是对边缘。值越高,云的平面和均匀度就越高。
保障范围[0. . 100% ]
Left, low 左,低Coverage 覆盖范围
value; right, higher 价值; 右,更高Coverage 覆盖范围 value. 价值
This is the most important cloud setting. With it you define the degree of cloud coverage. Very low values result in no cloud coverage; very high values result in a completely overcast sky.
这是最重要的云设置。通过它你可以定义云覆盖的程度。非常低的值导致没有云覆盖; 非常高的值导致完全阴天。
厚度[0.5000% ]
Left, low 左,低Thickness 厚度
value; right, higher 价值; 右,更高Thickness 厚度 value. 价值
Thickness is the measure of the degree to which the sunlight will be dispersed or absorbed. This can be equated with the lighting of the clouds by the sun. Lower values result in the clouds being brightened more by the sunlight, higher values result in darker clouds.
厚度是衡量太阳光被分散或吸收的程度。这可以等同于太阳对云层的照明。较低的数值导致云层被阳光照得更亮,较高的数值导致云层颜色更深。
透明度[0. . 100% ]
Left, high 左高Transparency 透明度 value; right, low 价值; 右,低Transparency 透明度
value. 价值
Transparency regulates the degree to which 2D clouds cast shadows onto volumetric clouds and/or other objects in the scene. Enter a value of 100% if no shadows should be cast.
透明度调节2D 云彩在场景中体积云和/或其他物体上投射阴影的程度。如果不应该投射阴影,则输入100% 的值。
If, in addition to the sun, you add light sources that cast shadows, make sure they are placed at a height greater than 10,000m (for the calculation of shadows on 2D clouds a layer (internal), located at this height, is used). 如果,除了太阳,你添加了投射阴影的光源,确保它们被放置在一个大于10,000米的高度(为了计算2D 云层上的阴影,使用了一层(内部) ,位于这个高度)Anim. Speed [-∞ . . + ∞% ]
The animation speed defined here relates to the noise structure – not the position of the clouds! The higher the value, the more the clouds will billow. You have probably seen slow motion clips of billowing clouds literally being created out of the blue; this setting lets you create a similar effect. If you also animate the cloud position (use the Pos. N-S and Pos. W-E settings), the result will be very realistic.
这里定义的动画速度与噪音结构有关——而不是云的位置!数值越高,云层越会翻滚。你可能已经看到了慢动作片段的巨浪云从字面上被创造出来的蓝色; 这个设置让你创造一个类似的效果。如果您还动画云的位置(使用 Pos。N-S 和 Pos。设置) ,结果会非常真实。
偏移[-∞ . . + ∞]
This setting lets you define a different starting point for the billowing defined in Anim. Speed. Let’s assume you have animated a cloud formation. Unfortunately, a part of the cloud formation will cover the sun at the very start of the animation. To remedy this, simply enter a different Offset value to alter the start of the animation.
这个设置可以让你定义一个不同的起点,为在 Anim 中定义的巨浪。速度。让我们假设您已经制作了一个云形成动画。不幸的是,在动画开始的时候,部分云层会遮住太阳。要解决这个问题,只需输入一个不同的偏移量值来改变动画的开始。
标度 N-S [1. . + ∞% ] W-E [1. . + ∞% ]
Clouds scaled in one direction only. 云朵只朝一个方向扩展
These settings let you scale the noise pattern in the North-South (N-S) or West-East (W-E) directions. If your cloud formations are too small or too large, simply scale them by scaling these settings equally. You can easily create long, thin, stretched cloud formations by scaling them in one direction only.
这些设置使您可以在南北或东西方向上缩放噪声模式。如果你的云层太小或者太大,简单地按比例缩放这些设置。你可以很容易地创建长,薄,伸展云的形成通过缩放他们在一个方向只。
Pos. N-S[-∞..+∞m]
W-E[-∞..+∞m]
Pos. N-S [-∞ . . + ∞ m ] W-E [-∞ . . + ∞ m ]
Use these settings to move your clouds in the North-South (N-S) or West-East (W-E) directions. Animate these settings if you want your clouds to move across the sky. If you also want the clouds to change their structure as they move, set Anim. Speed to a value greater than 0.
使用这些设置在南北或东西方向移动你的云。如果您希望云彩在天空中移动,那么可以动画这些设置。如果你还想让云移动的时候改变它们的结构,设置 Anim。速度为大于0的值。