 Mabel Shader 梅布尔着色器Basic 基础VeiningDiffuse A 漫反射 aSpecular 1 A 镜面1 aSpecular 2 A 镜面2 aSpecular 3 A 镜面3 aReflection A 反射 aEnvironment A 环境 aAmbient A 环境 aRoughness A 粗糙度 aAnisotropy A 各向异性 aDiffuse B 扩散 bSpecular 1 B 镜面1 bSpecular 2 B 镜面2 bSpecular 3 B 镜面3 bReflection B 反射 bEnvironment B 环境 bAmbient B 环境 bRoughness B 粗糙度 bAnisotropy B 各向异性 bIllumination 照明Assign 分配
Illumination
照明
These parameters control the global illumination effect for the material and have the same function as the settings of the same name that are described in the Material / Illumination chapter.
这些参数控制材质的全局光源效果,并且与材质/照明章节中描述的同名设置具有相同的功能。
生成 GI
Deactivate this setting if a given material should not have an effect on other objects.
如果给定的材质不会对其他物体产生影响,则停用此设置。
实力[0. . 10000% ]
Use this setting to define how strong a given material will emit. The default value is 100% and values up to 10000% can be entered.
使用此设置可定义给定材质发射的强度。默认值为100% ,可以输入最大为10000% 的值。
接收 GI
Deactivate this option if a given material should not receive brightness or color from other objects.
如果给定的材质不能从其他物体接收亮度或颜色,则停用此选项。
实力[0. . 10000% ]
When active you can define to what degree a given material will receive color and brightness of other materials.
当激活时,你可以定义给定的材质将接收到其他材质的颜色和亮度的程度。
饱和度[0. . 1000% ]
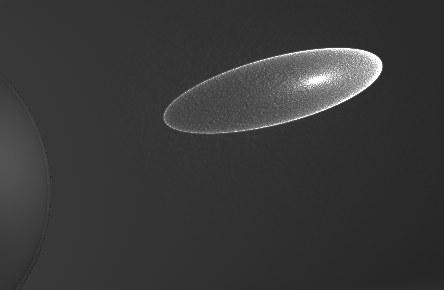
 From left to right: Increasing saturation
values. 从左到右: 增加饱和值
From left to right: Increasing saturation
values. 从左到右: 增加饱和值
Use this setting to define the level of saturation of the light radiated or reflected from the material. This lets you accurately adjust the "color bleeding" for that material.
使用这个设置来定义材质辐射或反射的光的饱和度水平。这可以让你准确地调整“颜色出血”的材质。
生成焦散线
Enable this option to activate Photon caustics generation for the active material. Make sure that either the Transparency (for caustics that result from light breaking through water in a glass) or Reflection (for caustics resulting from light reflecting from a curved object) material channels is active.
启用此选项激活活性材质的光子焦散产生。确保透明度(用于玻璃中光线穿透水产生的焦散线)或反射(用于弯曲物体反射光产生的焦散线)材质通道是活跃的。
Note: 注意:实力[0. . 10000% ]
Use the input box to set the strength of the effect.
使用输入框设置效果的强度。
接收焦散
This enables/disables the reception of surface Photon caustics for the material.
这使得/禁用材质表面光子焦散的接收。
实力[0. . 10000% ]
Use the input box to set the strength of the effect.
使用输入框设置效果的强度。
半径[0. . + ∞ m ]
This specifies how close photons must be to one another in order to be interpolated. Higher values tend to produce better results but they also take longer to render.
这规定了光子之间必须有多近才能被插值。更高的价值倾向于产生更好的结果,但他们也需要更长的时间来渲染。
 Radius = 1; individual photons can be seen as
points of light because they are not interpolated together. 半径 = 1; 单个光子可以看作光点,因为它们没有被插值在一起
Radius = 1; individual photons can be seen as
points of light because they are not interpolated together. 半径 = 1; 单个光子可以看作光点,因为它们没有被插值在一起
 Radius = 10. 半径 = 10
 Radius = 100. 100
Larger values would only make the Photon Caustics appear more blurred.
较大的值只会使光子焦散显得更加模糊。
If the defined value is too small, individual photons will become visible. This might make for an interesting visual effect but is not suited for realistic renderings. Larger values will combine and interpolate photons accordingly, which produces a realistic caustics effect.
如果定义的值太小,单个光子就会变得可见。这可能是一个有趣的视觉效果,但不适合现实的渲染。更大的值将相应地组合和插入光子,这将产生一个真实的焦散效果。
样本[1.10000]
This defines the maximum number of photons within the Radius that are used to calculate the effect. For example, if you enter a value of 100, up to 100 photons will be evaluated — any photons in excess of this number are ignored. Samples and Radius both affect the quality of the effect.
这定义了用于计算效果的半径范围内的最大光子数。例如,如果你输入一个值100,多达100个光子将被计算ーー任何超过这个数字的光子将被忽略。样品和半径都会影响效果的质量。
To summarize: more samples per radius means a more accurate image. Increasing the Radius means more blur but a longer render time also.
总结一下: 每个半径更多的样本意味着更精确的图像。增加半径意味着更多的模糊,但渲染时间也更长。