 Generation
 Feathers 羽毛Basic 基础Coord.Object 对象Shape 形状
Object Properties
对象属性
展示编辑器
This option must be activated if you want the feather hair to be displayed in blue in the editor view.
如果您希望羽毛毛发在编辑器视图中以蓝色显示,则必须激活此选项。
编辑器检测限[0. . 100% ]
Use this setting to define the Level Of Detail of the feather hair in the editor, i.e., how many of the hairs will actually be displayed (and rendered) in the editor view (this is dependent upon the Spacing menu settings) as thin lines.
使用此设置在编辑器中定义羽毛的细节级别,即在编辑器视图中实际显示(和呈现)多少羽毛(这取决于间距菜单设置)为细线。
Generation
一代
生成
Use this setting to define how the feather hair will be treated, as hair or as splines.
使用此设置定义羽毛毛发将如何处理,作为毛发或作为样条。
This setting becomes relevant if you make the Feather object editable. Depending on the setting you choose, an object will either be generated as hair using guides or simply as a spline object. The Splines option lets you drag a Feather object directly onto one of the (Spline)Generators.
如果您使羽化对象可编辑,则此设置变得相关。根据您选择的设置,一个对象可以使用指南生成为毛发,也可以简单地作为样条对象生成。Splines 选项允许您将 Feather 对象直接拖动到(样条)生成器之一上。
倒车
This setting will reverse the direction of the graphs in the Shape tab.
此设置将颠倒“形状”选项卡中图形的方向。
片段[1. . 1024]
Use this setting to define the number of hair segments. Feathers do not require a high number of segments. The preset value of 6 should be enough and can generally remain unchanged.
使用此设置来定义毛发片段的数量。羽毛不需要大量的羽节。预置值6应该足够,并且一般可以保持不变。
Spacing
间隔
间隔
There are two methods with which the spacing of the feather hair, the so-called barbs, can be regulated:
有两种方法可以调节羽毛间距,即所谓的倒钩:
适应性
The number of Barbs will indirectly regulate the spacing.
倒钩的数量将间接地调节间距。
固定的
Spacing will be regulated by the settings in the Spacing menu.
间距将由间距菜单中的设置来调节。
If the spline length is animated and the amount of feather hair changes in order to maintain correct spacing between hairs (this will happen if the Fixed option was selected), flickering can occur. To avoid this, select the Adaptive option.
如果样条长度是动画和羽毛毛发的数量变化,以保持毛发之间的正确间距(这将发生如果固定选项被选中) ,闪烁可能会发生。要避免这种情况,请选择“自适应”选项。
Relative Size
Rachis Length[0..+∞m]
相对 SizeRachis 长度[0. . + ∞ m ]
Use these settings to define the relative effect the most important Feather settings and the quill length will have on each other. This setting allows you to apply the Feather object to other larger or smaller splines, without changing the basic shape of the feather. When setting the length of the rachis, it’s better to enter a length equal to that of the actual rachis.
使用这些设置来定义最重要的羽化设置和羽毛长度对彼此的相对影响。此设置允许您将羽化对象应用于其他较大或较小的样条,而不改变羽化的基本形状。当设置轴的长度时,最好输入与实际轴的长度相等的长度。
If you are planning on using different spline sizes, activate Relative Size before you make the settings for the feather.
如果您打算使用不同的样条尺寸,请在设置羽毛之前激活相对大小。
Not all settings (e.g., Rotation) will work if Relative Size is active, and all feathers will look similar but will not be identical.
并不是所有的设置(例如,旋转)都会工作,如果相对大小是活跃的,所有的羽毛将看起来相似,但不会是相同的。
Rachis Radius[0..+∞m]
Top[0..+∞m]
轴半径[0. . + ∞ m ]顶部[0. . + ∞ m ]
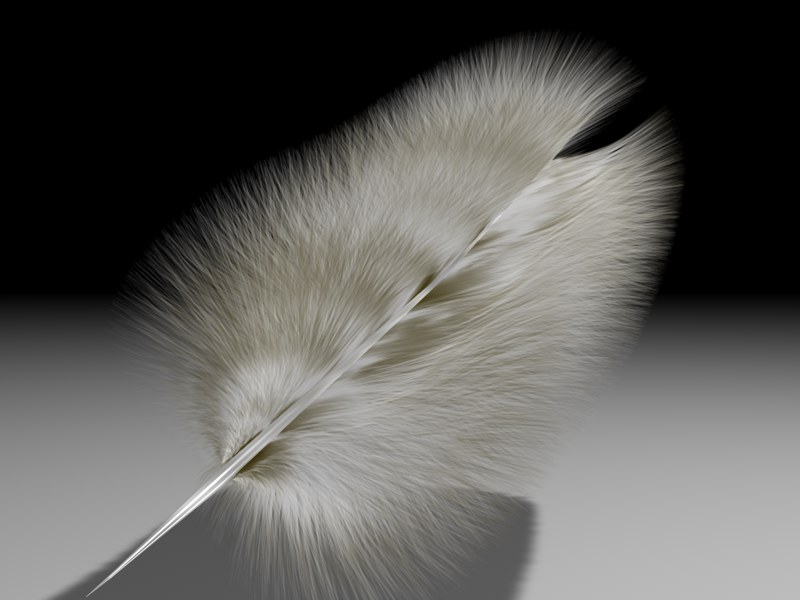
 Various Feather parameters. 各种羽化参数
Rachis Radius defines the distance of the barbs from the start of the spline at the base of the feather. Top defines the distance the barbs will be from the tip of the feather. This setting lets you simulate a narrowing rachis.
轴半径定义了羽毛底部花键开始处倒钩的距离。陀螺定义了倒钩与羽毛顶端之间的距离。这个设置允许您模拟一个收缩轴。
开始[0. . 100% ]结束[0. . 100% ]
These settings let you define at which point on the spline the barb growth will start and end. The feather shown above has, for example, a Start value of 12% and an End value of 100%, i.e., the barb growth takes place along 88% of the rachis, beginning at the 12% point.
通过这些设置,可以定义花键生长的开始和结束位置。例如,上面显示的羽毛的起始值为12% ,结束值为100% ,也就是说,羽毛的生长沿着88% 的羽轴开始,从12% 的点开始。
Barb Spacing[0..+∞m]
Variation[0..+∞m]
倒钩间距[0. . + ∞ m ]变化[0. . + ∞ m ]
If Fixed spacing has been selected, enter the distance between hairs here. Use Variation to randomly vary the spacing for a more realistic look.
如果选择了固定间距,在这里输入毛发之间的距离。使用变化,随机变化的间距更真实的外观。
倒钩数[1. . 2147483647]
If the Adaptive option is selected in the Spacing menu, enter the number of feather hairs in Barb Count.
如果在“间距”菜单中选择“自适应”选项,则在“倒钩数量”中输入羽毛数量。
Barb Length[0..+∞m]
Variation[0..+∞m]
倒钩长度[0. . + ∞ m ]变化[0. . + ∞ m ]
Use this setting to define the maximum feather hair length, which is restricted by the Shape Tag’s Shape function graph.
使用此设置定义最大羽毛毛发长度,该长度受到“形状标签”的“形状”函数图的限制。
Displacement
排水量
 From left to right: Curve (Top) / Curve (Base) = 0;
Curve (Top) = 80 / Curve (Base) = 0; inverted; both = 80. The corresponding graphs can be seen at the bottom
right. 从左到右: 曲线(上)/曲线(下) = 0; 曲线(上) = 80/曲线(下) = 0; 倒置; 两者都 = 80。相应的图形可以在右下角看到
From left to right: Curve (Top) / Curve (Base) = 0;
Curve (Top) = 80 / Curve (Base) = 0; inverted; both = 80. The corresponding graphs can be seen at the bottom
right. 从左到右: 曲线(上)/曲线(下) = 0; 曲线(上) = 80/曲线(下) = 0; 倒置; 两者都 = 80。相应的图形可以在右下角看到
Curve (Top)[0..+∞m]
Variation[0..+∞m]
Curve (Base)[0..+∞m]
Variation[0..+∞m]
曲线(上)[0. . + ∞ m ]变分[0. . + ∞ m ]曲线(下)[0. . + ∞ m ]变分[0. . + ∞ m ]
Together with Curve (Shape tab), you can reshape the barbs along their length. Use the Curve (Top) setting to define the strength of the reshaping at the top of the feather. Curve (Base) defines the strength of the reshaping at the bottom of the feather. The reshaping of barbs between the top and base of the feather is done using interpolation. Variation defines the degree to which the reshaping should be randomly varied.
与曲线(形状标签)一起,你可以重塑倒钩沿他们的长度。使用曲线(顶部)设置来定义羽毛顶部整形的强度。曲线(基线)定义了羽毛底部的整形强度。羽毛顶部和底部之间倒钩的重塑是通过插值完成的。变化定义了改变的程度应该是随机变化的。
Displace[0..+∞m]
Variation[0..+∞m]
位移[0. . + ∞ m ]变化[0. . + ∞ m ]
 A view along the length of a feather: Left, a lower
沿着羽毛长度的视图: 左下角Displace 取代 value; right, a higher 价值; 对,更高Displace 取代
value. 价值
A view along the length of a feather: Left, a lower
沿着羽毛长度的视图: 左下角Displace 取代 value; right, a higher 价值; 对,更高Displace 取代
value. 价值
The barbs can be curved along their profile by using the Cross Section graphs in the Form tab. The Displace setting simply defines the strength with which the barbs will be curved perpendicular to the spline tangent.
通过使用 Form 选项卡中的横截面图,倒钩可以沿着它们的轮廓线弯曲。置换设置简单地定义了倒钩垂直于样条切线弯曲的强度。
Rotation
旋转
 From top to bottom: Lower, middle, high
value. 从上到下: 低,中,高价值
From top to bottom: Lower, middle, high
value. 从上到下: 低,中,高价值
烂步[-∞ . . + ∞ ° ]
Use this setting to twist the barbs around the feather’s axis along its length. This setting can be made per barb or hair, along the length of the rachis. The rotation is dependent on the number of hairs, so don’t be surprised if you only need a setting of around 0.001 to make the hair twist 30°.
使用这个设置可以沿着羽毛的轴线扭转倒钩。这个设置可以作出每倒钩或毛发,沿着轴的长度。旋转取决于毛发的数量,所以如果你只需要0.001左右的设置就可以使毛发扭曲30 ° ,不要感到惊讶。
变分[-∞ . . + ∞ ° ]
Use the Variation setting to randomize the Rotation effect. A possible result could look similar to the one below:
使用变化设置来随机化旋转效果。一个可能的结果可能看起来类似于下面的:

Enter lower values here as well, since higher values can lead to a feather duster effect.
在这里输入较低的值,因为较高的值会导致鸡毛掸子效果。
旋转[-∞ . . + ∞ ° ]
Use this setting to rotate the entire feather hair around the spline. This can be practical if the hairs happen to be pointing in the direction of the camera, and thus cannot be seen. The hairs can then be quickly rotated 90°.
使用此设置可以围绕样条旋转整个羽毛毛发。这是可行的,如果毛发恰好指向相机的方向,因此不能被看到。然后毛发可以快速旋转90 ° 。
变化[0. . + ∞ ° ]
Variation is similar in function to Rot Step, with the difference being that the rotation can be randomly applied per spline / segment, when several splines are used under a single Feather object (or a single spline with several segments). The feather hair on each spline will then point in a different direction.
变化在函数上类似于 Rot Step,不同之处在于旋转可以随机应用于每个样条/段,当多个样条在一个 Feather 对象下使用(或者一个带有多个段的样条)。然后,每条样条上的羽毛将指向不同的方向。
Rachis Rot[0..+∞°]
Barb Rot[0..+∞°]
倒钩腐烂[0. . + ∞ ° ]倒钩腐烂[0. . + ∞ ° ]
 Effects of 影响Rachis
Rotation 轴旋转 and 及Barb Rotation 倒钩旋转.
Effects of 影响Rachis
Rotation 轴旋转 and 及Barb Rotation 倒钩旋转.
Use these settings to randomly rotate every barb around these rotational axes, within the angles entered:
使用这些设置随机旋转每个倒钩围绕这些旋转轴,在输入的角度内:
This will bring chaos to the perfectly rowed barbs. The result will be similar to fluffy down feathers.
这会给整齐划一的倒钩带来混乱,结果就像羽毛蓬松一样。
Gaps
差距
差距[0. . + ∞ m ]
 Intermittent gaps make a feather look more
realistic. 间歇的间隙使羽毛看起来更真实
Intermittent gaps make a feather look more
realistic. 间歇的间隙使羽毛看起来更真实
Use this setting to define the size of the gaps between barbs. If several gaps are already present, and the number of gaps is again raised using the Gap setting, gaps lying in close proximity to one another will be closed. It is not recommended that the Gap settings be animated, since they can start jumping from one location to another.
使用此设置可定义倒钩之间的间隙大小。如果已经存在几个缺口,并且使用缺口设置再次提高缺口的数量,彼此靠得很近的缺口将被填补。不建议将 Gap 设置动画化,因为它们可以从一个位置跳到另一个位置。
变异[0. . + ∞ m ]
Use this setting to randomly vary the size of the gaps. After all, ten equally wide gaps just does not look very realistic.
使用此设置可随机改变间隙的大小。毕竟,10个同样宽的间隔看起来不太现实。
出现[0. . 100% ]
Use this setting to adjust the number of randomly dispersed gaps.
使用此设置可调整随机分散的间隙数。