 Camera 相机
 Correction 更正
 Muscle 肌肉
Brush
刷子
Tip: 提示:
There are several Sculpting brushes available, designed for different purposes and with numerous shared parameters (which you might already be familiar with from using BodyPaint 3D). For example, each brush offers Size and Strength settings, among others. The settings can be defined individually or globally and can be saved in Sculpting brushes for later retrieval from the Content Browser.
有几款 Sculpting 笔刷可供选择,它们是为不同的目的而设计的,具有许多共享参数(您可能已经在使用 BodyPaint 3D 时熟悉了这些参数)。例如,每个笔刷都提供了尺寸和强度设置等等。这些设置可以单独或全局定义,并且可以保存在 Sculpting 笔刷中,以便以后从内容浏览器中检索。
Tip: 提示:Point, edge and polygon selections will be observed, i.e., only selected elements will be moved by the brush.
点,边和多边形的选择将被观察,也就是说,只有选定的元素将被移动的画笔。
All brushes work with only a few exceptions (which are of little use in this regard anyway: e.g., Erase, Repeat, Amplify, Mask). In very few cases, some brush modes are not supported (e.g., all three FillDraw Modes).
所有的笔刷只有少数例外(这些例外在这方面用处不大: 例如,擦除,重复,放大,遮罩)。在极少数情况下,不支持某些画笔模式(例如,所有三种 FillDraw 模式)。
Furthermore, Sculpt brushes can be used to modify some Deformation objects and objects:
此外,Sculpt 笔刷可以用来修改一些 transformation 对象和对象:
Camera 相机Correction 更正Muscle 肌肉Note also that the Sculpt brushes now offer spline snapping (enable the Spline Snap option in the main Snap menu):
还要注意的是,雕刻笔刷现在提供了样条捕捉功能(在 Snap 主菜单中启用样条捕捉选项) :
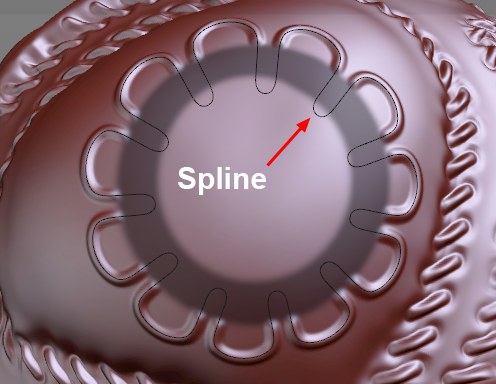
The splines to not have to lie on the surface of the Sculpt object: move and rotate the spline so it lies correctly over the object. Then roughly follow the spline with the brush (note also the Snap Radius option). The brush stroke will follow the spline exactly.
样条曲线不必躺在造型对象的表面上: 移动和旋转样条曲线,使其正确位于对象上方。然后粗略地使用画笔沿着样条走(还要注意 Snap Radius 选项)。画笔笔触将严格遵循花键。
Brushes also snap to the Guide object (the Guide Snapping option must be enabled in the Snap settings).
笔刷也与指南对象对齐(指南抢购选项必须在管理单元设置中启用)。
互动性
 Sculpt brushes can be modified interactively using
hotkeys. 雕刻笔刷可以交互修改使用热键
Sculpt brushes can be modified interactively using
hotkeys. 雕刻笔刷可以交互修改使用热键
Sculpt brushes are displayed in the Viewport according to their size, strength and falloff when the cursor is placed over objects that can be sculpted.
雕刻笔刷根据它们的大小、强度和衰减在 Viewport 中显示,当光标放置在可雕刻的对象上时。
The following combinations (the first two points work for all brushes in Cinema 4D) can be used:
下面的组合(前两点工作的所有刷子在C4D)可以使用:
Otherwise the following key combinations can prove to be very useful:
否则,下面的组合键可以证明是非常有用的:
鼠标右键在 Viewport 中放大一个模板。
雕刻刷拉
雕刻笔刷抓斗
光滑的笔刷
刷蜡造型
雕刻刷刀工具
刷夹具
雕刻刷压平
雕刻刷充气
雕刻笔刷放大工具
雕刻刷填充
雕刻刷重复工具
刮刷雕刻
笔刷擦除工具
笔刷选择工具
雕刻笔刷蒙版工具